




How to Effortlessly Generate Invoices in 5 Simple Steps
If invoice creation feels like a mini admin nightmare, you’re not alone. The good news: you can generate invoices in minutes once you set things up properly.
Below is a simple 5‑step flow using BillingNow's invoice generator that you can repeat for every client.
Step 1: Set up your business profile once
Before sending anything, tell the system who you are.
Add:
- Business name and address
- Logo (optional, but looks more professional)
- Default currency and language
- Tax/VAT number if you have one
In BillingNow, you do this in your account settings, and your details auto‑fill on every new invoice. No more copy‑paste errors.
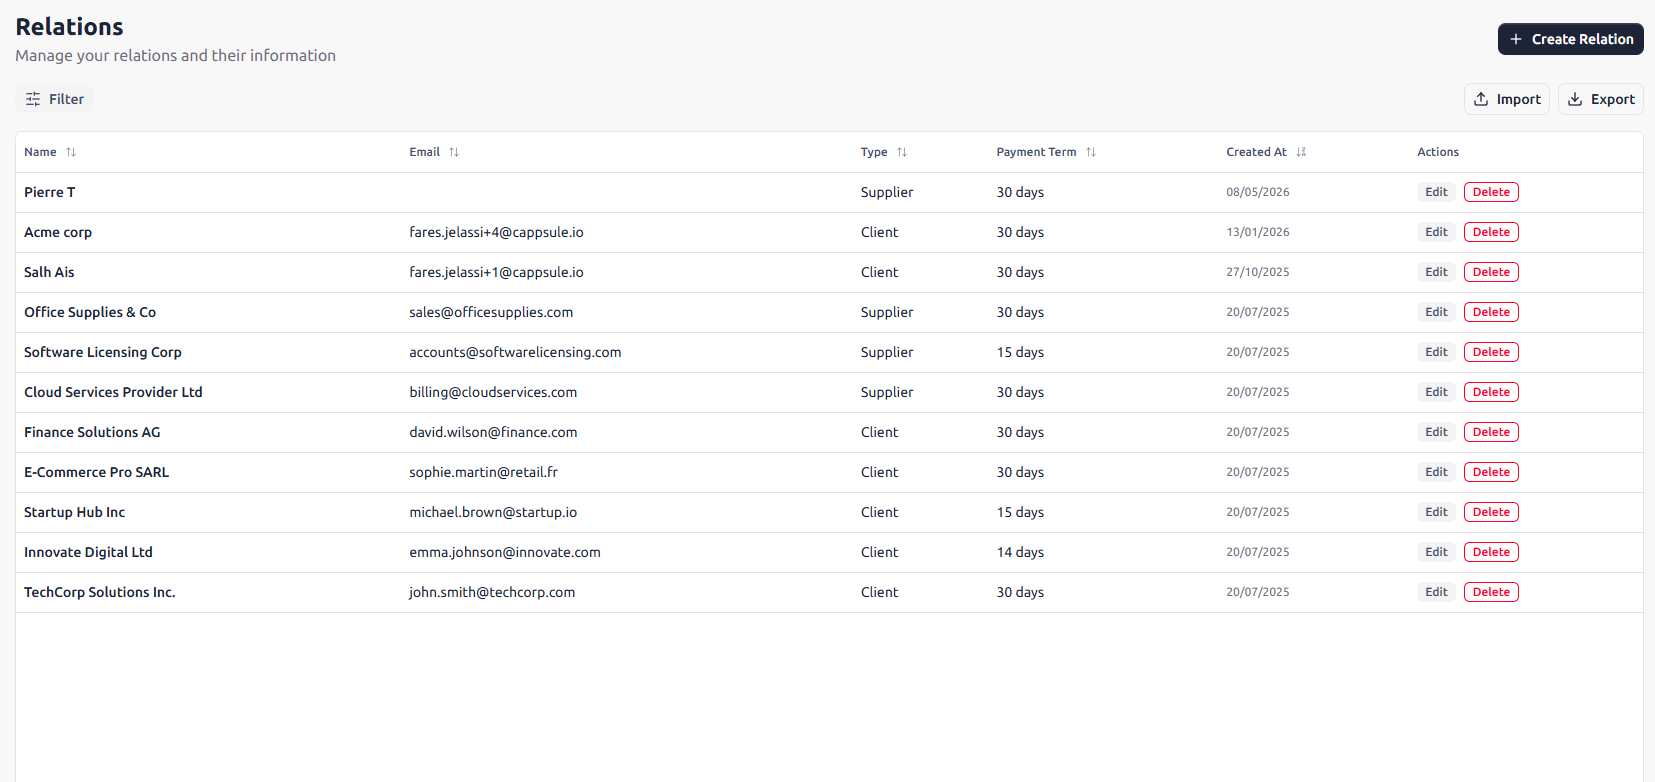
Step 2: Add clients the smart way
Next, create your client list.
For each client, store:
- Company name and contact person
- Billing address
- Email for invoices
- Payment terms you’ve agreed (7, 14, 30 days)
BillingNow keeps this in your client management area, so for the next invoice you just select them from a dropdown. If you ever need to update details, you change them once, not on 20 different files.
Step 3: Let AI help fill in invoice details
This is where most people waste time.
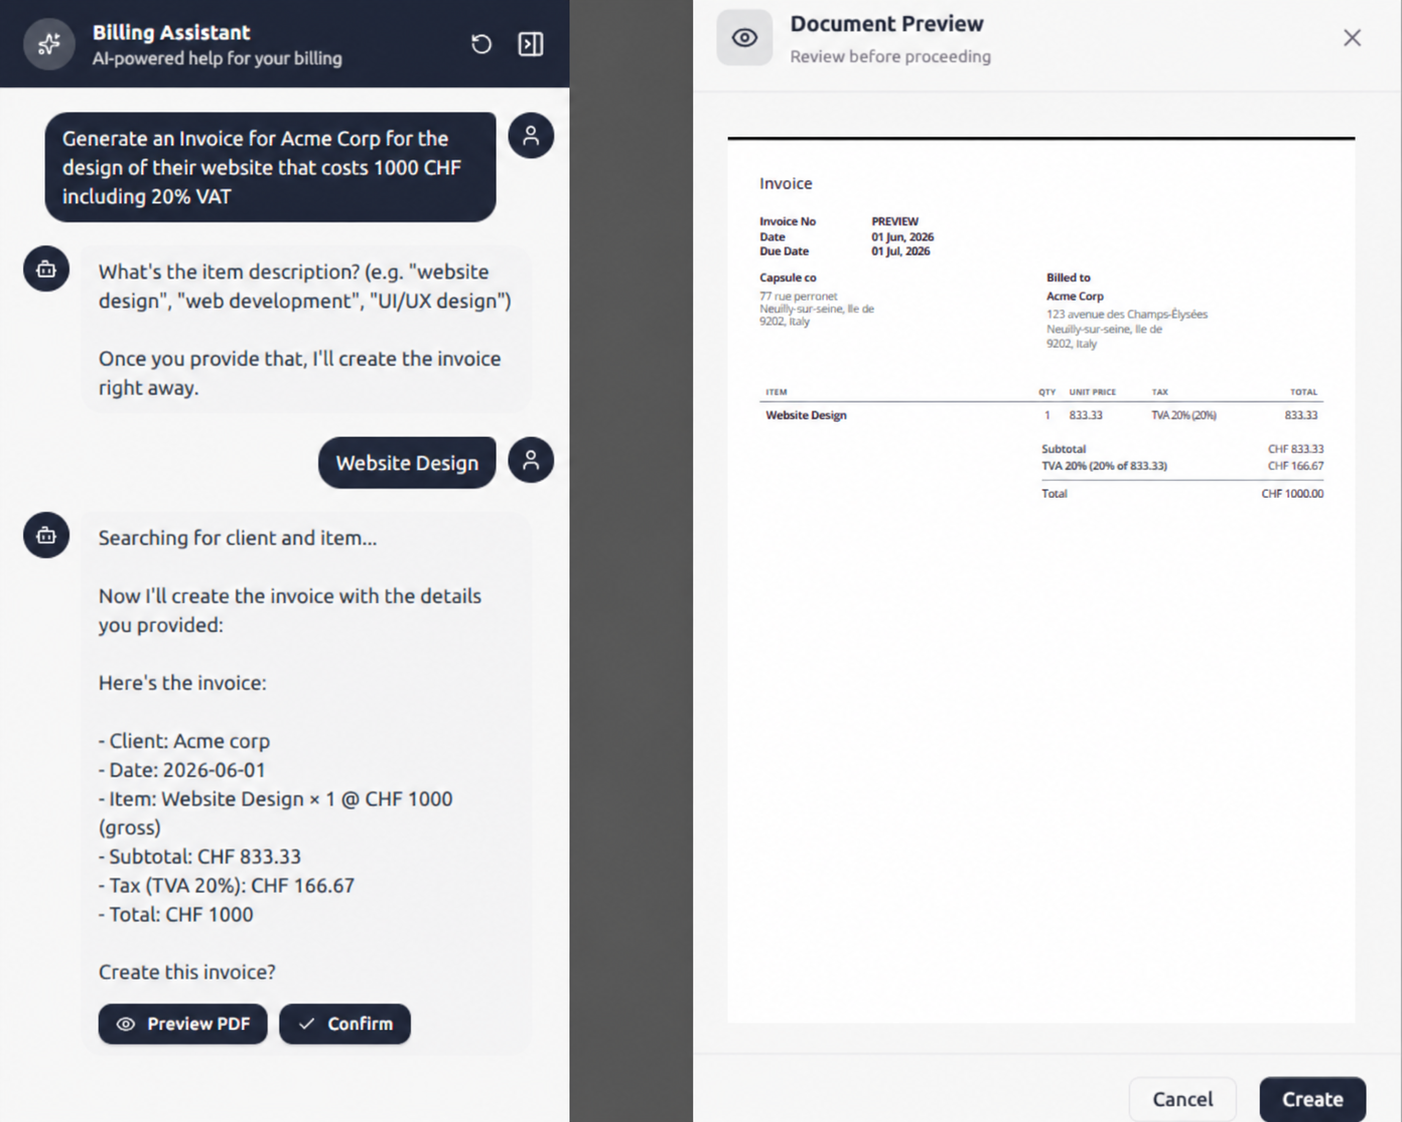
With BillingNow AI agents, you can:
- Auto‑suggest invoice descriptions based on past work
- Pull in logged hours or items from your expense records
- Apply your usual payment terms automatically
You still stay in control, but the assistant removes the blank‑page syndrome and repetitive typing.
Step 4: Add line items and VAT correctly
Now add what you’re billing for:
- Service or product name
- Quantity or hours
- Unit price
- Discount (if any)
If you work with VAT, use the BillingNow VAT calculator to get the right tax amounts. The system totals everything automatically so your math is always clean.
Step 5: Send, track, and get paid
Once you’re happy with the invoice:
- Preview it to see exactly what your client will receive.
- Send by email directly from BillingNow, or export as PDF.
- Track payment status in your payment tracking dashboard.
You’ll see who’s paid, who’s late, and who needs a reminder, without scrolling through old emails.
Next: Turn your 5 steps into a 1‑click routine
After you’ve done this flow once, you can save templates and recurring invoices in BillingNow. Pair that with expense tracking and the free BillingNow CLI if you like automation, and your “5 steps” shrink to almost no steps at all.